


How to Attach a Holster to a MOLLE Vest Without Sagging
Table of Contents
- What You'll Need Before You Start
- Understanding PALS Webbing and Why Holsters Sag on a MOLLE Vest
- How to Weave MOLLE Straps for a Holster Mount
- Choosing the Right MOLLE Holster Adapter for Your Setup
- Anti-Sag Hardware Solutions That Actually Work
- Securing Your Holster: Webbing Tension, Friction Locks, and Snap Closures
- Preventing Gear Sag on Tactical Vests: Weight Distribution and Load Balance
- Material Compatibility: Matching Holster, Vest, and Hardware
- Troubleshooting Loose or Sagging Holster Mounts
- Frequently Asked Questions
Last Updated: September 25, 2026
What You'll Need Before You Start
Gather the right tools first, or you'll fight the webbing instead of the sag. Attaching a molle vest holster without sagging takes about 20 to 30 minutes per mount and a handful of inexpensive parts.
Here is what to have on hand:
- MOLLE holster adapter or holster shell with PALS-compatible holes
- MOLLE straps or clips (short MALICE-style clips work well)
- Flathead screwdriver or a stiff plastic strap tool
- Blue medium-strength threadlocker for any screws
- Lighter to singe cut strap ends
- Ruler or tape measure to set ride height
A word on safety: check your local and state laws on how you carry and transport firearms, since rules vary widely by state. State firearm laws overview is a good starting point.

Understanding PALS Webbing and Why Holsters Sag on a MOLLE Vest
PALS webbing is the grid of horizontal straps sewn onto a tactical vest, and it is the foundation of every MOLLE platform. Each row is stitched at regular intervals to create loops. You thread straps through those loops to lock gear in place.
Holsters sag for three common reasons:
- The strap is woven through too few loops, so weight pulls it down
- The mount sits too low, creating a lever that increases vertical sag
- The webbing tension is loose, letting the holster shift on every draw
A molle vest holster is heavier than most pouches, and it gets yanked hard during a draw. That repeated force is what separates a stable mount from a sagging one. The physics are simple: the farther the weight sits from the attachment point, the more the whole setup wants to rotate and drop.
This is why ride height and weave pattern matter more for a holster than for a magazine pouch. Get those two right and most sag problems disappear before you ever add hardware.
How to Weave MOLLE Straps for a Holster Mount
Weaving is where most people rush, and it's where sag starts. Follow these steps and pull each pass tight as you go.
- Line up the adapter so its holes sit over a full PALS row.
- Push the strap end through the top loop from the front.
- Weave down and back up through the next row, alternating over and under.
- Keep the strap flat, not twisted, the whole way through.
- Pull each pass tight before moving to the next loop.
- Thread through at least three rows for a holster.
- Lock the end with the snap closure or buckle.
- Trim excess strap and singe the cut end.
The tight weave pattern is the point. A loose weave lets the holster rock, and rocking turns into sag. If you can slide a finger under the strap, it's too loose.
Choosing the Right MOLLE Holster Adapter for Your Setup
The adapter is the bridge between your holster and the vest, and the wrong one causes sag no matter how well you weave. The reason is mechanical: every adapter adds a layer between the holster body and the PALS grid, and every layer is a flex point. Sag is not caused by the strap alone, it is caused by the holster body rotating away from the vest around whichever layer flexes first.
Match the adapter to how you actually carry, and understand what each one does under load:
| Adapter Type | Best For | Mounting Style | Why It Sags (or Doesn't) |
|---|---|---|---|
| MOLLE clip adapter | Quick setup, light holsters | Straps through PALS | Clip body flexes under draw force; the strap holds, the clip bends |
| Tek-Lok style | Belt and vest crossover | Adjustable clamp | Clamp grips the holster shell directly, so there is no strap-to-shell gap to stretch |
| Drop-offset plate | Lower ride height | Screw-mounted plate | Lengthens the lever arm from the PALS row to the holster's center of gravity |
| Direct shell mount | Kydex shells with PALS holes | Straps or screws | Removes one layer entirely; the shell is the adapter |
For a duty or range setup, a direct shell mount beats a generic adapter. It removes a layer of hardware, and fewer layers mean less movement. The trade-off is that a direct shell mount locks you into one holster shell, you cannot swap between a pistol and a light-bearing shell without re-weaving.
A Tek-Lok style clamp is the better choice when you want to move the same holster between a belt and a vest. The clamp grips the shell itself, so the only flex point left is the PALS weave. That is a meaningful difference: with a clip adapter, the draw force travels through the strap, the clip, and the shell. With a clamp, it travels through the strap and the shell.
A drop-offset plate is the adapter most likely to cause sag, and the reason is geometry, not quality. The plate moves the holster's center of gravity farther from the PALS row, which increases the leverage every draw applies to the top row of webbing. If you need a lower ride height for a chest-mounted or cross-draw setup, pair the offset plate with a rigid backing plate so the load spreads across two rows instead of one.
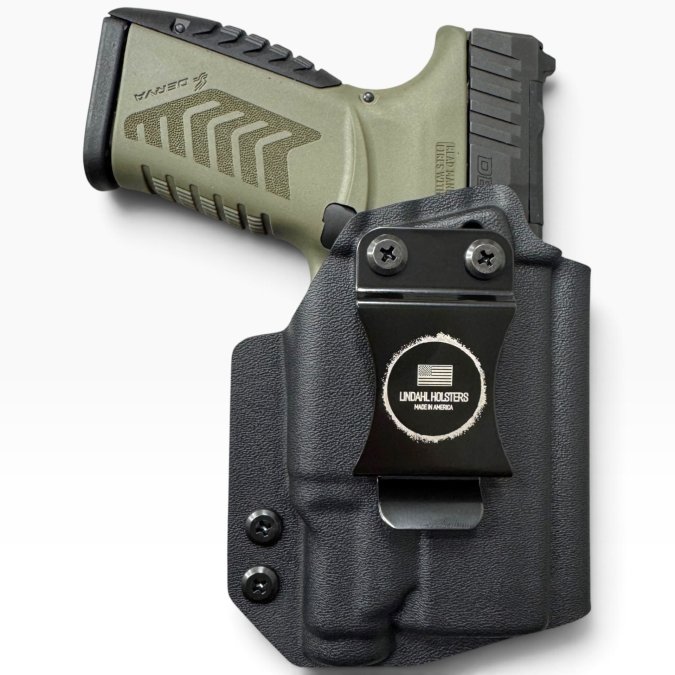
Lindahl Holsters builds Kydex shells with pre-drilled mounting patterns that work with MOLLE and TEK-LOK setups, so the shell itself becomes the adapter. That cuts out the flex point where most sag begins.
One more adapter variable most guides skip: hole spacing. PALS rows are spaced on a standard 1-inch vertical rhythm, but adapter hole patterns vary. If the adapter holes do not line up with a full PALS row, you end up weaving through a partial row, which gives you fewer contact points and more play. Measure the adapter's hole spacing against your vest's row spacing before you buy, not after.
Anti-Sag Hardware Solutions That Actually Work
Hardware fixes sag when the weave alone cannot hold the weight. The goal is not to add more mount points, it is to spread load across more of the PALS grid and to stop movement at the source. Most guides stop at 'add a backing plate' without explaining what the plate actually does. Here is the mechanism behind each option.
Backing plates work by increasing the surface area that screw pressure acts on. A screw driven through a single PALS loop concentrates force on a small patch of webbing, which stretches over time. A plate behind the webbing distributes that same force across the full plate footprint, so no single loop takes the load. This is the single most effective anti-sag addition for a screw-mounted adapter. Integrating these rigid supports into your loadout remains a foundational step when building modular kits to ensure your gear stays secure during high-intensity movement.
Rigid mounting plates solve a different problem: adapter flex. A polymer clip or thin plate bends under draw force, and that bend is what lets the holster rotate away from the vest. A rigid plate, typically aluminum or a stiffened polymer, does not bend, so the draw force transfers into the PALS grid instead of into the adapter. The trade-off is weight and a slightly thicker profile against your body.
Zip-tie reinforcement is the low-cost option most competitors ignore. Running a heavy-duty zip tie through the same PALS row as your strap, tightened against the adapter, adds a second tension path that resists vertical drop. It is not a substitute for a proper weave, but it is a fast field fix when a strap has stretched and you need the holster stable before the next session. Use UV-resistant ties; standard nylon ties degrade in sunlight.
Velcro-backed stabilizers address lateral rocking rather than vertical sag. A hook-and-loop pad between the adapter and the vest face adds friction across the whole contact area, which stops the side-to-side movement that loosens a weave over time. This is the fix for a holster that stays at the right height but shifts left and right on every draw.
Steel belt clips add retention where polymer clips flex. For anyone mounting to a belt or a hybrid setup, a steel clip makes a real difference. The DCC Monoblock IWB Belt Clip uses high-strength spring steel and a dual-slot pattern that spreads weight evenly, which cuts the shifting that leads to sag. At $5.99, it is a cheap upgrade that solves a stubborn problem.
CAT-6 Tourniquet Holster Shell – MOLLE →

Reinforced straps resist stretching under a heavy holster. Standard nylon webbing relaxes slightly with use, and a strap that felt tight on day one can lose tension within a week. Straps with a woven-in stiffener or a wider profile hold tension longer, which means fewer re-weaves.
If you carry a medical item alongside your firearm, the CAT-6 Tourniquet Holster Shell ($12.95) mounts on the same MOLLE and TEK-LOK patterns, so you can build a balanced loadout without adding separate hardware.
The takeaway: pick hardware that spreads load, not hardware that just adds a mount point. A backing plate plus a rigid adapter solves most sag; zip ties and Velcro stabilizers are the targeted fixes for vertical drop and lateral rocking respectively.
Securing Your Holster: Webbing Tension, Friction Locks, and Snap Closures
Tension and locking hardware keep a holster from creeping once it's mounted. Even a perfect weave loosens over time if nothing holds the strap end.
Three things control this:
- Webbing tension is how tight the strap sits against the PALS grid
- Friction locks grip the strap so it can't slide back through
- Snap closures add a hard stop at the strap end
Check tension after the first week of use, then again after any hard training session. Webbing stretches slightly as it settles, and a strap that felt tight on day one can loosen within days.
Preventing Gear Sag on Tactical Vests: Weight Distribution and Load Balance
Preventing gear sag on tactical vests comes down to balance, not brute force. A holster on one side and nothing on the other creates a lean that pulls the whole vest off-center.
Balance the load like this:
- Mirror heavy items, like a holster on one side and a magazine carrier on the other
- Keep the heaviest gear close to your body's center line
- Mount holsters at the same height on both sides when you can
- Move rarely used items to lower, less stressed rows
Weight distribution physics are simple. A load placed far from the center pulls harder on the webbing because it has more use. Move it inward and the same weight stresses the mount far less.
This is the angle most guides skip. They treat sag as a strap problem when it's often a balance problem. Fix the layout and half your sag complaints go away.
Material Compatibility: Matching Holster, Vest, and Hardware
Mixing materials without thinking about how they interact causes wear and looseness. Kydex, nylon webbing, and steel hardware each behave differently under load.
What to watch:
- Kydex shells hold shape and resist flex, which keeps retention consistent
- Nylon webbing stretches slightly and settles over time
- Steel clips grip harder than polymer but can abrade cheap webbing
The real difference between a mount that lasts and one that fails often comes down to how these three work together. A stiff Kydex shell on soft webbing needs a rigid backing plate so the shell doesn't dig in and stretch the loops.
If you're coming from a leather or polymer holster, expect a Kydex shell to feel firmer and hold its shape better. That firmness is what keeps retention steady, and it's why custom Kydex holsters stay consistent draw after draw.
Troubleshooting Loose or Sagging Holster Mounts
Fix sag by finding the cause, not by tightening everything. Loose mounts usually trace back to one of four problems.
| Problem | Likely Cause | Fix |
|---|---|---|
| Holster drops straight down | Too few loops woven | Add a third row of weaving |
| Holster rocks side to side | Loose webbing tension | Re-tighten the strap |
| Mount works loose over time | Missing threadlocker | Add blue threadlocker to screws |
| Vest leans to one side | Poor load balance | Mirror the weight |
A common mistake is adding more hardware when the weave is the real problem. Re-weave first, then add a lock or backing plate only if sag continues.
If screws keep backing out, blue medium-strength threadlocker stops them without locking them so tight you can't remove them later. Check every screw after the first range session, then every few weeks after that.
A sagging holster is more than an annoyance. It slows your draw, wears your gear, and creates a safety risk when seconds count. The fix starts with a tight weave and the right adapter, then hardware that spreads load and holds tension. Lindahl Holsters builds custom Kydex holsters and MOLLE-compatible shells with pre-drilled mounting patterns, a 1-3 business day lead time, and a 15% discount for military, law enforcement, and first responders. Find your gun model and build a mount that stays put.
Frequently Asked Questions
Why does my holster sag on my MOLLE vest?
Sagging usually happens because the attachment straps aren't woven tightly enough, the holster weight isn't supported by enough PALS rows, or the hardware lacks anti-slip features. A heavy holster on a single row of webbing will pull down over time. Using a rigid adapter plate, weaving through at least two rows, and adding friction locks or snap closures can eliminate vertical sag and keep your holster in place.
Can I use a regular belt holster on a MOLLE vest?
Most belt holsters aren't designed for MOLLE attachment. You'll need a MOLLE holster adapter or a holster shell with pre-drilled mounting holes that align with PALS webbing. Adapters like the CAT-6 Tourniquet Holster Shell from Lindahl Holsters are built for MOLLE and TEK-LOK compatibility, giving you a secure platform. Check that your holster's mounting pattern matches the adapter before buying.
What are MOLLE-Lok attachments and how do they work?
MOLLE-Lok attachments are hardware pieces that lock onto PALS webbing without weaving straps. They use a snap closure or friction lock to grip the webbing tightly, preventing horizontal shift and vertical sag. They're faster to install than traditional weaving and can be moved between vests. However, they require specific mounting hole spacing on your holster or adapter, so verify compatibility first.
How do I keep my tactical gear from shifting on my vest?
Preventing gear sag on tactical vests starts with balanced weight distribution. Place heavier items close to your body's centerline and use anti-sag hardware like rigid adapter plates or friction locks. Weave straps through at least two rows of PALS webbing and pull them tight before securing. For holsters, a drop-offset adapter can improve ride height and reduce leverage that causes shifting.

