


How to Modify a Kydex Holster for Red Dot Sight Clearance
Table of Contents
- Why Modify a Kydex Holster for Red Dot Sight Clearance
- Best Tools for Cutting Kydex
- Safety Precautions and Protective Gear
- Marking the Cut Line for Red Dot Clearance
- Step-by-Step Cutting Process
- Avoiding Structural Damage to the Holster
- Maintaining Holster Retention After Modification
- Common Mistakes to Avoid
- Conclusion: A Custom Fit for Your Optic-Ready Setup
- Frequently Asked Questions
Last Updated: October 4, 2026
Why Modify a Kydex Holster for Red Dot Sight Clearance
Learning how a kydex holster modification for red dot sight clearance works starts with one hard truth: most holsters are molded for iron sights, not optics. A red dot sits higher than a standard rear sight. That extra height means the optic body can catch the holster's top edge during the draw.
The result is friction, scraping, and a slower draw stroke. In a worst-case scenario, the optic can snag and stop the draw entirely.
Plenty of shooters already own a good holster that simply predates their optic. Modifying it is faster and cheaper than buying new.
Below, we'll show you exactly how to open up that clearance safely, without wrecking retention or the holster's structure.
Signs Your Holster Needs Optic Clearance
A holster needs optic clearance when the red dot sight contacts the holster body during the draw or holstering. You don't need to guess. The signs show up fast:
- The optic scrapes or drags on the top edge of the holster
- You see scuff marks or finish wear on the optic body
- The draw stroke feels rough or inconsistent
- The gun won't fully seat when you re-holster
- You have to tilt or wiggle the firearm to get it in
If you notice any of these, stop forcing it. Repeated contact wears your optic's finish and can shift your zero over time. A small trim fixes the problem before it costs you a sight.
Best Tools for Cutting Kydex
The best tools for cutting Kydex are a rotary tool with a cut-off wheel and a sanding drum, plus hand tools for finishing. You don't need a full shop. A few basic items get the job done cleanly.
Here's what to gather:
- Rotary tool (Dremel-style) with a cut-off wheel and a sanding drum
- Utility knife or heavy-duty shears for light trimming
- Sanding block with 220, 400, and 600-grit paper
- Fine file for tight corners
- Blue painter's tape for marking and protecting surfaces
- Marker for the cut line
- Safety gear (covered in the next section)
Kydex is a thermoform plastic. It cuts fast, so control matters more than power. A sharp cut-off wheel removes material in seconds. Go slow and check your line often.
Dremel Speed and Technique
Run your rotary tool at a moderate speed, roughly the middle of its range, and let the wheel do the work. Too fast and the Kydex melts and gums up the wheel. Too slow and you'll chatter and leave a ragged edge.
Keep these points in mind:
- Use light, steady passes instead of pushing hard
- Keep the wheel moving so heat doesn't build in one spot
- Let the tool cool if the Kydex starts to smell hot
- Hold the holster firmly so it doesn't jump
Heat is the enemy here. Warm Kydex gets soft and can deform out of shape. If the material feels warm to the touch, pause and let it cool.
Safety Precautions and Protective Gear
Kydex cutting throws tiny plastic chips and fine dust. Protect your eyes and lungs before you start. This isn't optional.
Wear these every time:
- Eye protection (wrap-around safety glasses or goggles)
- N95 or better dust mask
- Work gloves to guard against sharp edges and heat
- Long sleeves to keep chips off your skin
Work in a well-ventilated area. A garage with the door open works well. Avoid carpeted rooms where dust settles and is hard to clean.
Also, unload your firearm and remove the optic or the gun from the workspace before you cut. Keep ammunition in another room. Treat every firearm as loaded until you've checked it yourself.
The CDC guidance on eye safety is a useful reminder that flying debris causes a large share of preventable workshop injuries.
Marking the Cut Line for Red Dot Clearance
Mark the cut line by seating the gun in the holster and tracing where the optic contacts the top edge. The goal is to remove only what blocks the optic, nothing more.
Follow these steps:
- Unload the firearm and triple-check it's clear.
- Seat the gun fully in the holster.
- Look for where the optic body touches or rubs the Kydex.
- Apply blue painter's tape along the top edge for a clean guide.
- Draw a line just above the contact point, leaving a small margin.
Leave a margin of a few millimeters. You can always remove more material. You can't add it back.
Mark a tapered notch rather than a straight cut. A taper follows the shape of the optic and keeps the holster's edge strong. A blunt, square cut weakens the top and looks rough.
Step-by-Step Cutting Process
The cutting process has two stages: rough cutting to remove the bulk, then sanding to shape and smooth the edge. Rushing either stage shows in the final fit.
Work slowly and test the fit between passes. Small adjustments keep you in control.
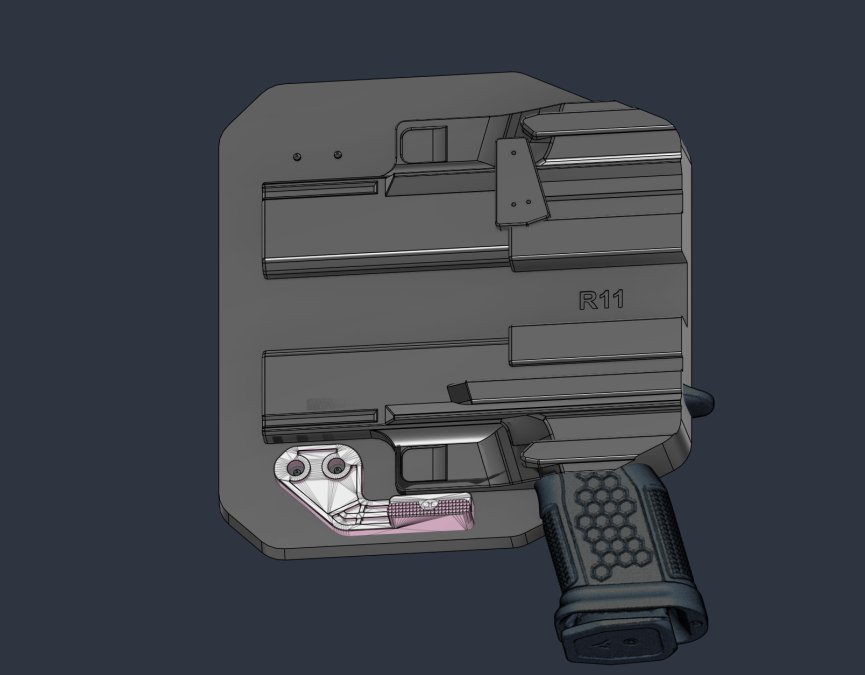
Rough Cutting with a Cut-Off Wheel
Rough cutting removes the main section of material blocking the optic. Stay just outside your marked line.
ModWing™ Concealment Wing (Claw) Kit →
- Fit the cut-off wheel to your rotary tool
- Start at one end of the marked notch
- Make light passes along the line
- Stop short of the corners and finish them by hand
- Test-fit the gun after each pass
Stop as soon as the optic clears. The rough cut doesn't need to be pretty. Sanding handles the finish.
Sanding and Finishing Edges
Sanding smooths the cut and rounds the edge so it won't catch on the optic or your clothing. Work from coarse to fine grit.
- Start with 220-grit on a sanding block to level the cut
- Move to 400-grit to remove scratches
- Finish with 600-grit for a smooth, polished feel
- Use a fine file for tight inside corners
- Wipe away dust and inspect the edge
A smooth, rounded edge protects your optic's finish and feels better against your body. For a factory-grade look, finish with a light pass of fine paper wrapped around a dowel or pen.
Avoiding Structural Damage to the Holster
Structural damage happens when you cut into the retention area or remove too much of the top edge. The retention zone is the molded section that grips the trigger guard and frame. Never cut there.
Keep these rules in mind:
- Stay above the retention area at all times
- Keep the notch narrow and tapered
- Don't thin the walls of the holster body
- Don't cut through any mounting holes or hardware points
- Check the holster's shape after each pass
Kydex holds its shape because of how it's molded. Remove too much and the holster can flex or crack under stress. A structural integrity check means flexing the holster gently and looking for cracks or weak spots.
Material matters here too. Thicker Kydex tolerates more trimming than thin sheets. If your holster feels flexible before you start, be extra careful. Thin material leaves less room for error.
Maintaining Holster Retention After Modification
Retention is the holster's grip on the gun, and it's the first thing to suffer after a bad cut. Test it before you carry. A modified holster that holds the gun loosely is not safe to use.
Retention comes in two forms. Passive retention relies on the molded fit and friction. Active retention uses a mechanical device, like a thumb release, common on duty holsters. Trimming the top edge affects passive retention most. Active systems usually stay intact if you don't touch their hardware.
To check and restore retention:
- Seat the gun and turn the holster upside down
- Give it a gentle shake. The gun should stay put
- Adjust the retention screw if your holster has one
- Re-check after every adjustment
If retention feels loose, tighten the retention screw a quarter turn at a time. If your holster has no adjustment screw, you may have removed too much material. In that case, a new holster built for your optic is the safer choice.
Testing Retention After Modification
Test retention by performing the inverted shake test and several slow draw strokes. The gun should stay secure when inverted and release cleanly on the draw.
Run through this checklist:
- Inverted shake test with the gun seated
- Ten slow draw strokes, checking for snags
- Ten re-holster attempts, checking for full seating
- Confirm the optic clears with no contact
- Check that the trigger guard is fully covered
If the gun drops free during the shake test, stop. Do not carry that holster until retention is fixed. A holster that won't hold the gun is a liability, not a tool.
Common Mistakes to Avoid
Most kydex holster modification problems trace back to a handful of avoidable errors. Knowing them ahead of time saves you a ruined holster.
Watch for these:
- Cutting too much material. Mark conservatively and remove in small steps.
- Running the tool too fast. High RPM melts Kydex and ruins the edge.
- Skipping safety gear. Plastic chips in the eye are a real risk.
- Ignoring retention. Always test after cutting, never assume.
- Cutting a square notch. A tapered notch keeps the edge strong.
- Forgetting to deburr. Sharp edges snag on clothing and optics.
- Rushing the finish. A rough edge looks bad and wears your gear.
After modification, do a little post-modification maintenance. Check your mounting hardware for tightness. Repeated handling can loosen screws. A small amount of blue medium-strength threadlocker keeps them from backing out. Keep a replacement hardware kit on hand for worn or lost parts, and inspect the edge every few weeks for cracks or wear.

If you'd rather skip the guesswork, a holster molded for your exact optic removes the risk. Our custom Kydex holsters are built around your firearm and sight from the start.
Conclusion: A Custom Fit for Your Optic-Ready Setup
Modifying a holster for an optic is a small job with real stakes. Cut too little and the optic snags. Cut too much and the holster stops holding the gun. The margin between the two is narrow, and it's measured in millimeters.
If you'd rather not gamble on that margin, Lindahl Holsters builds custom Kydex holsters around your exact firearm and red dot, with a 1-3 business day lead time and free shipping on orders over $125. Military, law enforcement, and first responders get 15% off. FIND YOUR GUN MODEL and carry with a fit that was made for your setup, not trimmed to fake it.
Frequently Asked Questions
Is it safe to cut a Kydex holster for a red dot sight?
Yes, if you follow proper safety protocols and use the right tools. Kydex is a thermoform plastic that can be cut, sanded, and reshaped without compromising its structure, as long as you avoid overheating the material. Wear eye protection and a dust mask, work in a ventilated area, and use a Dremel at low RPM with a cut-off wheel. Always test retention after modification to ensure the holster still holds your handgun securely.
What tools are needed to modify a Kydex holster?
For a clean modification, you need a Dremel or rotary tool with a cut-off wheel and sanding drum, a utility knife or heavy-duty shears for rough cutting, a sanding block with fine-grit sandpaper, a marker for tracing the cut line, and safety gear including eye protection, a dust mask, and gloves. A polishing wheel helps smooth edges. If you need replacement hardware after the job, Lindahl Holsters offers a replacement hardware kit for $5.99.
How do I maintain holster retention after modifying it?
After cutting and sanding, reinsert your handgun and check passive retention by turning the holster upside down. The gun should stay in place without excessive force. If retention feels loose, you can gently heat the holster with a heat gun and press the material inward around the trigger guard. For adjustable retention, tighten the retention screws. If hardware loosens over time, replace it with a kit like the Lindahl Holsters IWB Hardware Replacement Kit.
Can I use a heat gun to reshape Kydex for optic clearance?
Yes, a heat gun can soften Kydex for reshaping, but you must use it carefully. Hold the gun 6 to 8 inches away and move it constantly to avoid overheating and warping the holster. Heat only the area needing adjustment, then press the material outward with a gloved hand or a rounded tool. Let it cool completely before testing fit. Overheating can ruin the holster's structural integrity, so work in small increments.

