


Kydex Holster Maintenance Tips: Keep Retention Strong
Table of Contents
- What You'll Need to Maintain a Kydex Holster
- Step-by-Step Cleaning Process for Kydex Holsters
- Kydex Holster Hardware Maintenance: Screws, Clips, and Thread-Locker
- How to Adjust Holster Retention Without Damaging the Shell
- How to Modify Kydex Holster for Red Dot Sight Clearance
- Drying Techniques and Moisture Control
- Chemicals and Abrasives to Avoid on Kydex
- Long-Term Storage vs. Daily Carry Maintenance
- How Often to Inspect and Maintain Your Holster
- Frequently Asked Questions
Last Updated: September 17, 2026
What You'll Need to Maintain a Kydex Holster
Kydex holster maintenance is the practice of routinely cleaning, inspecting, and adjusting a Kydex holster so it keeps consistent retention and protects your firearm over years of carry. A small kit and ten minutes a month can prevent most of the problems shooters blame on the holster itself.
Here's what belongs in that kit:
- Mild soap (dish soap or a gentle hand soap, nothing with citrus or bleach)
- Lukewarm water in a small bowl
- Microfiber cloths, at least two
- Soft-bristle brush or an old toothbrush for crevices
- Cotton swabs for screw heads and tight corners
- Blue threadlocker (medium strength) for hardware
- Replacement hardware kit with spare screws and posts
- Compressed air or a can of electronics duster for debris
You do not need solvents, polishes, or specialty cleaners. Kydex is a thermoplastic sheet, and most harsh products do more damage than the dirt you're removing.

Step-by-Step Cleaning Process for Kydex Holsters
The safest cleaning method is a dry-first, wet-second approach: knock out loose debris, wipe the shell with a damp cloth and mild soap, then dry completely before reassembly. This sequence protects the finish and keeps moisture out of the hardware.
- Unload and clear the firearm. Remove the gun, magazine, and any light or optic before you touch the holster.
- Brush out loose debris. Use the soft brush to sweep lint, dust, and grit from the inside of the shell and the sweat guard.
- Mix mild soap with lukewarm water. A few drops in a bowl is enough.
- Wipe the shell inside and out. Dampen a microfiber cloth, wring it out, and wipe in one direction.
- Scrub the crevices. Use the toothbrush around the trigger guard channel, retention screws, and clip mount.
- Wipe again with a clean, damp cloth. Remove all soap residue.
- Dry thoroughly before reassembly. More on this below.
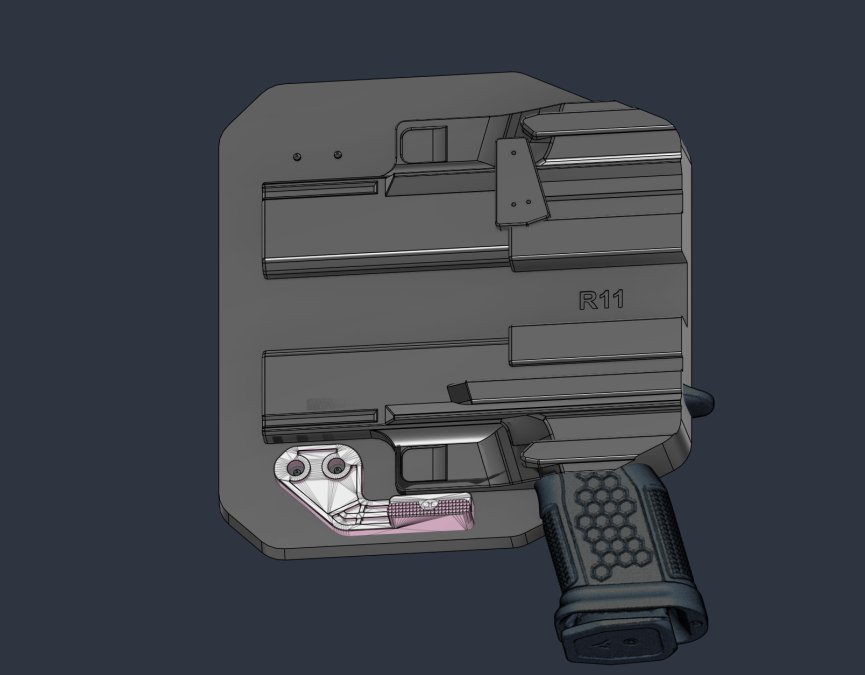
Clean Sweat-Guard and Body-Contact Points
The sweat guard is the highest-wear zone on any inside-the-waistband holster, and it's the part most shooters ignore. Skin oils, salt, and moisture collect there every carry day, and left alone they can discolor the Kydex and accelerate corrosion on the slide.
Wipe the sweat guard and any body-contact surface with a damp microfiber cloth after heavy sweat days. A quick pass takes thirty seconds and prevents the buildup that leads to mildew smell and finish damage.
Kydex Holster Hardware Maintenance: Screws, Clips, and Thread-Locker
Kydex holster hardware maintenance is the single most neglected part of a carry routine, and it's where most retention failures start. Screws back out from vibration and repeated draw cycles, clips loosen, and thread engagement weakens over time.
The fix is straightforward: inspect every screw and clip monthly, snug anything loose, and apply a small amount of medium-strength threadlocker to the threads. Lindahl Holsters offers blue threadlocker made for exactly this job. A drop on the threads keeps screws from backing out while still allowing future adjustments.
For worn or lost components, keep a spare set on hand. The Lindahl Holsters replacement hardware kit includes the screws, posts, and mounting hardware used on our IWB systems.

When to Replace Worn Hardware
Replace any screw, post, or clip that shows stripped threads, rounded heads, cracks, or visible bending. Clips that have lost their spring tension or that slide on the belt should also be swapped out.
For a belt clip upgrade, the DCC Monoblock IWB belt clip is a steel option that holds firm where polymer clips eventually give up. If you're replacing a standard clip, the Lindahl Holsters IWB standard belt clip is a direct-fit replacement for our IWB configurations.

Hardware Issue |
Warning Sign |
Fix |
|---|---|---|
Loose screw |
Wobble at the clip or retention post |
Snug and apply blue threadlocker |
Stripped threads |
Screw spins without tightening |
Replace screw and post |
Weak clip tension |
Holster shifts or lifts on the draw |
Replace the belt clip |
Cracked post |
Visible split at the mounting point |
Full hardware replacement |
How to Adjust Holster Retention Without Damaging the Shell
Retention adjustment comes down to one rule: turn the screw a quarter-turn at a time, test, and repeat. Kydex retention is set by how tightly the shell grips the trigger guard and slide, and small changes make a big difference.
To adjust retention, locate the retention screw near the trigger guard. Tighten clockwise to increase hold, loosen counterclockwise to reduce it. After each quarter-turn, insert the unloaded firearm and test the draw. You want a firm hold with a clean, deliberate release, not a fight and not a slip.
Retention Adjustment Troubleshooting
If the holster still feels wrong after adjusting, the problem is usually one of four things:
- Too tight even when fully loosened: the shell may have warped from heat. Do not force it. Contact the maker.
- Too loose even when fully tightened: the screw may be stripped, or the shell has stretched from heavy use.
- Inconsistent from draw to draw: check that the mounting hardware is snug and the clip isn't shifting.
- Gun rattles in the shell: this usually points to a fitment issue, not a retention setting.
How to Modify Kydex Holster for Red Dot Sight Clearance
Most modern Kydex holsters ship with an optic cut, and modifying an existing shell for red dot clearance is a job best left to the manufacturer. Trimming Kydex by hand risks cracking the shell, weakening the retention zone, and voiding any warranty.
If your current holster doesn't clear your optic, the safer path is a purpose-built shell. Lindahl Holsters builds custom Kydex holsters around specific firearm, light, and optic combinations, so the cut is molded in, not carved out. Our gun model finder walks you through the exact configuration.
If you must trim an existing shell, use a rotary tool on low speed, cut in small passes, and sand the edges smooth. Test fit after every pass. Never cut into the retention area around the trigger guard.
Drying Techniques and Moisture Control
Air drying is the only safe method for a Kydex holster, but "air dry" is not a single instruction, it's a process with variables. Kydex is a thermoplastic sheet, and it begins to soften well below the temperatures a hair dryer or oven produces. Heat warps the shell, and a warped shell loses retention permanently. Trapped moisture is the second problem: it feeds mildew in the sweat guard, corrodes steel hardware, and leaves salt residue that attracts more grit on the next carry day.
Here's how to dry a Kydex holster correctly:
- Shake off standing water. Hold the shell open-end down and give it a firm shake to clear pooled water from the trigger guard channel and clip mount.
- Wipe the shell inside and out with a dry microfiber cloth. Use a second cloth for the sweat guard so you're not spreading moisture back onto the shell.
- Wick the crevices. Roll a cotton swab or a corner of the cloth into the retention screw holes, clip mount, and any optic cut. These are the spots that stay damp longest.
- Air dry open-end up in a well-ventilated spot at room temperature. Open-end up lets gravity pull residual moisture down and out rather than trapping it in the shell.
- Wait at least an hour before reassembly. In humid climates or after a full wash, give it two to three hours. The sweat guard is usually the last part to dry.
Never use a hair dryer, oven, microwave, radiator, dashboard, or direct sunlight to speed drying. All of these push the shell toward its softening range, and even a brief exposure can distort the retention zone.
Daily Carry vs. Storage Drying
Daily carry and long-term storage need different drying routines, and mixing them up is a common mistake:
- Daily carry: After a heavy sweat day, wipe the sweat guard and body-contact surfaces with a dry microfiber cloth and let the holster sit open-end up for 15-30 minutes before you reholster. This is a moisture-prevention step, not a full dry.
- After a full wash: Follow the five-step process above. Do not reassemble until the shell is completely dry to the touch, including the inside of the clip mount.
- Before storage: Dry fully, then leave the holster open-end up for an additional hour in a low-humidity room. Any residual moisture sealed inside a storage box will cause corrosion on hardware and a persistent smell.
Humidity and Climate Considerations
In humid climates, moisture control is an ongoing battle rather than a one-time step. A few practical habits help:
- Store the holster with a silica gel packet in the same box or drawer. Replace the packet every few months or when the indicator (if it has one) changes color.
- Avoid storing a holster in a closed plastic bag or a foam-lined case that traps moisture against the shell.
- Check stored holsters every few months for condensation, mildew smell, or rust-colored residue around screws and clips.
- If you carry in a humid environment daily, consider a second holster so each one has time to dry fully between uses.
Chemicals and Abrasives to Avoid on Kydex
Most Kydex damage isn't caused by dirt, it's caused by the cleaner someone reached for to remove the dirt. Kydex is a thermoplastic sheet, and many common household and gun-care products interact with it in ways that range from cosmetic to structural. Knowing what to avoid, and why, is the difference between a holster that lasts a decade and one that loses retention in a year.
The Do-Not-Use List
- Solvents, acetone, paint thinner, brake cleaner, MEK, and similar. These can soften the Kydex surface, dull the finish, and weaken the material at stress points like the trigger guard and retention screw area.
- Alcohol, isopropyl, ethanol, and alcohol-based wipes. Alcohol is a solvent for many plastics and will strip printed patterns and dull the finish over repeated use.
- Abrasive pads, steel wool, scouring sponges, sandpaper, and abrasive creams. These scratch the shell and create micro-grooves that trap grit and hold moisture.
- Citrus and bleach cleaners, the acids and oxidizers in these products attack the Kydex surface and can discolor it permanently.
- Petroleum-based lubricants, gun oil, CLP, and grease. These leave a residue that attracts dust and grit, and some formulations can soften the shell over time.
- Gun solvent, even when it's meant for the firearm, solvent that drips onto the holster during cleaning does the same damage as direct application.
- Silicone sprays and protectants, these leave a slick film that reduces friction in the retention zone and can change how the holster grips the firearm.
Why These Products Damage Kydex
The common thread is that all of these products either dissolve, soften, or abrade the thermoplastic. Kydex gets its retention from the precise shape molded into the sheet, the shell grips the trigger guard and slide because the material was formed to those dimensions. When a solvent softens the surface, that shape relaxes. When an abrasive scratches it, the surface area changes. When a lubricant coats it, friction drops. In every case, the retention you relied on is altered, and the change is usually permanent.
Safe Alternatives
You do not need specialty cleaners. Mild dish soap or gentle hand soap mixed with lukewarm water handles almost every cleaning task. For stubborn residue:
- Dried sweat and salt: a damp microfiber cloth with a drop of mild soap, followed by a clean damp wipe.
- Grit in crevices: a soft-bristle brush or old toothbrush, dry first.
- Sticky residue from tape or labels: a small amount of mild soap and patience, not solvent.
- Odor in the sweat guard: a full wash with mild soap, thorough drying, and a silica packet during storage.
If a Prohibited Chemical Has Already Touched the Shell
If you've used alcohol, solvent, or an abrasive on your Kydex holster, here's how to assess the damage:
- Stop using the product immediately. Don't try to 'neutralize' it with another chemical.
- Wash the shell with mild soap and lukewarm water to remove any residue.
- Dry completely using the air-dry method.
- Inspect the surface under good light. A dull finish or light scratching is cosmetic. A soft, tacky, or gummy feel means the material has been compromised.
- Test retention with an unloaded firearm. If the holster no longer holds the firearm firmly, or if the draw feels inconsistent, the shell has lost its molded shape and should be replaced.
Printed and Patterned Kydex
If your holster has a printed or patterned finish, the rules are stricter. The pattern is a surface layer, and solvents and abrasives strip it faster than they affect the base sheet. Stick to mild soap, lukewarm water, and a soft cloth, and never scrub a printed shell with anything abrasive, even lightly.
Long-Term Storage vs. Daily Carry Maintenance
Daily carry and long-term storage call for different routines, and mixing them up is a common mistake. A holster in daily rotation needs frequent light cleaning. A holster going into storage needs a thorough clean, dry, and protective setup.
For daily carry, wipe the shell weekly, inspect hardware monthly, and reapply threadlocker at the first sign of a loose screw. For storage, clean the holster fully, dry it completely, loosen the retention screw a half-turn to relieve pressure on the shell, and store it in a cool, dry place away from direct sunlight. Check stored holsters every few months for moisture or hardware corrosion.
How Often to Inspect and Maintain Your Holster
A simple schedule keeps a Kydex holster running for years:
Task |
Frequency |
Time Needed |
|---|---|---|
Dry-wipe shell and sweat guard |
Weekly |
1 minute |
Full clean with mild soap |
Monthly |
10 minutes |
Hardware and screw inspection |
Monthly |
5 minutes |
Threadlocker reapplication |
As needed |
2 minutes |
Retention test with unloaded firearm |
Monthly |
2 minutes |
Deep clean and storage prep |
Before storage |
15 minutes |
A common mistake is skipping the retention test. Retention can drift slowly, and you won't notice until you're drawing under pressure. Test it monthly with an unloaded firearm, and adjust in quarter-turns if needed.
Frequently Asked Questions
How often should you clean your IWB holster?
Clean an inside-the-waistband Kydex holster every one to two weeks if you carry daily, since sweat and body oils build up quickly against the shell. In hot weather or after heavy range sessions, clean it more often. Wipe the body-contact side with a damp microfiber cloth and mild soap, then let it air dry completely. Regular cleaning protects the finish on your firearm, prevents debris from collecting near the retention screws, and keeps the holster performing consistently. A quick inspection during each cleaning catches loose hardware before it becomes a problem.
What is the best way to clean sweat and salt from a Kydex holster?
Mix a few drops of mild soap with lukewarm water, dampen a microfiber cloth, and wipe down the inside and outside of the shell. Pay extra attention to the sweat guard and any area that contacts your body, since salt and moisture collect there. Avoid soaking the holster or using harsh solvents. After wiping, use a dry cloth to remove excess moisture and let the holster air dry fully before reholstering your firearm. This routine removes salt residue that can contribute to corrosion on your gun's slide and keeps the Kydex surface clean.
Should you use lubricants on Kydex holsters?
No. Kydex does not need lubrication, and adding oil or grease can attract dust, lint, and debris that interfere with retention and scratch your firearm's finish. If you feel the draw is too tight, adjust the retention screws instead of applying a lubricant. For hardware, a small amount of blue medium-strength threadlocker on the screw threads is the correct product, not oil. It keeps screws from backing out during daily carry while still allowing future adjustments when you need them.
Can you re-mold a Kydex holster?
Re-molding Kydex at home is risky and usually not recommended. Kydex softens at high temperatures, and uneven heating can warp the shell, ruin retention, or create a poor fit around your firearm. If you need clearance for a red dot sight or a weapon-mounted light, check whether your holster was built with that configuration in mind. For minor tweaks, adjust retention screws first. If the shell needs structural changes, contact the manufacturer. Many custom holster makers, including Lindahl Holsters, can advise on the right model or modification for your setup. Consistent retention doesn't come from a single upgrade. It comes from a routine: clean the shell, check the hardware, test the draw, and replace worn parts before they fail. That's the standard Lindahl Holsters builds to, with custom Kydex holsters molded for your exact firearm, light, and optic, a 1-3 business day lead time, and a 15% discount for military, law enforcement, and first responders. Find your gun model and get a holster that holds up to the schedule above.

