


How to Choose a Holster for Beginners Without Wasting Money
Last Updated: October 29, 2026
Quick Summary
Learning how to choose a holster for beginners starts with treating the holster as a safety device, not an accessory. Prioritize a firearm-specific Kydex holster for beginners that fully covers the trigger guard, offers adjustable retention, and matches your real wardrobe and daily routine. Test it unloaded before you ever carry loaded.
- IWB holsters conceal well but draw slower; OWB holsters draw faster but need a cover garment.
- Strong-side hip carry is the most forgiving position for a first-time carrier to learn.
- Kydex is molded around the exact firearm model, holds its shape, and keeps the trigger guard rigid.
- Order the holster molded for your exact model, generation, optic, and weapon-mounted light.
- A flimsy belt sags under a loaded firearm, causing printing and an inconsistent draw.
Table of Contents
- Why the Right Holster Is a Safety Decision, Not an Accessory
- IWB vs. OWB: Matching the Holster to How You Actually Carry
- Appendix vs. Strong-Side Hip: Picking Your Carry Position
- Kydex, Leather, or Hybrid: What Material Suits a First Holster
- Firearm-Specific Fitment: Matching the Holster to Your Exact Gun
- Holster Retention and Full Trigger Guard Coverage Explained
- Ride Height, Cant, and Belt Attachment Options
- Concealment Wings and Reducing Printing
- Building a Comfortable Concealed Carry Setup for Your Body and Wardrobe
- Why a Quality Concealed Carry Belt Holds Everything Together
-
How to Safely Test Holster Fit and Comfort Before You Commit
- Step 1: Clear and Verify the Firearm
- Step 2: Confirm Fit and Trigger Coverage
- Step 3: Test Retention
- Step 4: Draw and Re-Holster Repeatedly
- Step 5: Wear It Through Your Real Day
- Step 6: Decide, Adjust, or Return
- Beginner Decision Tree: Which Holster Should You Start With?
- Beginner's Buying Checklist
- After the First Month: Inspection and Replacement
- Common Beginner Mistakes and How to Avoid Them
- Frequently Asked Questions
Why the Right Holster Is a Safety Decision, Not an Accessory
Learning how to choose a holster for beginners starts with one reframe: the holster for beginners is the safety device you wear every day, not the accessory you buy last. At Lindahl Holsters, we build custom Kydex holsters for first-time carriers, and the questions we field most often are not about color or finish.
A holster that fits poorly fails in three ways at once. It can let the trigger be reached while the firearm sits against your body. It can shift during a draw, turning a controlled motion into a scramble. And it can be uncomfortable enough that you start leaving the gun at home, which defeats the purpose entirely.
The National Shooting Sports Foundation publishes safety resources for new firearm owners, and the consistent theme is that safe carry depends on a rigid, firearm-specific holster that covers the trigger guard completely. That is the standard we build to.
Below, we walk through the decisions in the order that matters: carry style, position, material, fitment, retention, and comfort.
IWB vs. OWB: Matching the Holster to How You Actually Carry
Inside-the-waistband and outside-the-waistband holsters solve different problems, and the right answer depends on how you dress and where you go each day. IWB holsters sit between your body and waistband. OWB holsters ride on the outside of the belt.
| Feature | IWB | OWB |
|---|---|---|
| Concealment | Strong, sits close to body | Moderate, needs a cover garment |
| Comfort when seated | Depends on position and cant | Generally easier |
| Draw speed | Slower, requires clearing clothing | Faster, unobstructed |
| Clothing requirements | One size up in waistband helps | Jacket or untucked shirt |
| Best for | Daily discreet carry | Range use, cold weather, open carry |
Inside-the-Waistband Advantages and Trade-Offs
IWB wins on concealment. The firearm presses against your body, so the outline stays tight and the grip sits closer to your centerline. The trade-off is access: you must clear a shirt or waistband before you can grip the gun, and that takes practice.
A common mistake is buying an IWB holster that is too snug for the waistband you wear. Choose a waistband size that gives the holster room, because a holster that digs into your hip all day gets left in a drawer.
Outside-the-Waistband Advantages and Trade-Offs
OWB is the easier starting point for most new carriers. The draw is clean, the holster sits away from pressure points, and you can run it comfortably at the range while you build muscle memory. The catch is concealment: an OWB setup needs a cover garment, and in warm weather that means a loose untucked shirt or a light layer.
Neither style is "better." Pick the one that matches your actual wardrobe.
Appendix vs. Strong-Side Hip: Picking Your Carry Position
Carry position is where most beginner setups go wrong, because it dictates the holster's cant, ride height, and even the material that works.
Appendix carry places the holster inside the waistband at the front of the hip, roughly between the belt buckle and the strong-side hip. It conceals well under a t-shirt and keeps the grip accessible while seated or driving.
Strong-side hip carry puts the holster at roughly the 3 or 4 o'clock position for a right-handed shooter.
A practical rule: if you sit at a desk or drive for a living, appendix often conceals better; if you want the simplest draw to learn, start strong-side hip.
Kydex, Leather, or Hybrid: What Material Suits a First Holster
Material determines how the holster holds its shape, how it feels against your body, and how long it lasts. For a first holster, Kydex is a practical choice.
Kydex is a molded thermoplastic formed around the exact firearm model, so it clicks into place and holds that shape. It keeps the trigger guard rigid.
Leather is comfortable from day one and quiet against the body, but it stretches with use and absorbs moisture.
Hybrid holsters pair a rigid shell with a flexible backing.
For beginners, a firearm-specific Kydex holster removes the most variables: it holds its shape, stays easy to clean, and retention is adjustable rather than dependent on break-in.
Firearm-Specific Fitment: Matching the Holster to Your Exact Gun
Fitment is the single most important specification, and it is where generic holsters fail. A holster molded for a "compact 9mm" is not molded for your compact 9mm. Small differences in slide width, trigger guard shape, and accessory rails change the fit.
Three fitment variables decide whether a holster works:
- Exact model and generation. A Glock 19 holster is molded for the Glock 19, and generation differences can affect fitment.
- Optics. A red dot sits higher than iron sights and needs a holster cut to clear it.
- Weapon-mounted lights. A light changes the frame profile, so a light-bearing holster is a different mold entirely.
If you carry a Glock 19 with a weapon-mounted light, check the holster's listed options before ordering. Our Glock 19 IWB Holster is molded specifically for the Glock 19, and you select your generation, optic, and other available options when ordering so the shell matches your configuration.

If you carry a light or an optic, order the holster for that configuration rather than hoping a standard shell clears.
Holster Retention and Full Trigger Guard Coverage Explained
Holster retention is the force that keeps the firearm seated until you deliberately draw it. It is not a safety and does not replace one.
Two things matter for a first holster:
- Full trigger guard coverage. The holster must enclose the trigger guard completely so nothing can reach the trigger while holstered. This is non-negotiable.
- Adjustable retention. Retention should be tight enough that the gun does not fall out when you bend over or run, and loose enough to draw cleanly. Adjustable retention lets you tune that balance as the holster breaks in.
A simple field test: holster the unloaded firearm, turn the holster upside down over a soft surface, and shake gently. It should not drop free. Then draw it. It should release with a firm, consistent pull. If either test fails, adjust retention before you carry.
Ride Height, Cant, and Belt Attachment Options
Ride height and cant are the adjustments that turn a holster from "works" into "works for you." Ride height is how high or low the holster sits on your belt. Cant, sometimes called rake, is the angle of the holster relative to your body. Once you know what cant is, our guide to adjusting holster cant walks you through changing it step by step.
- Zero cant keeps the grip vertical. Good for appendix and range use.
- Forward cant (roughly 10 to 15 degrees) angles the grip back toward your hand. Common for strong-side hip carry and easier to draw from a seated position.
- Reverse cant angles the grip forward. Less common, usually a specialist setup.
Belt attachment matters just as much. Polymer clips are common and affordable but flex; steel clips hold their shape and keep the holster anchored during the draw. Our DCC Monoblock IWB Belt Clip is an upgrade built from high-strength spring steel, with a low-profile design and dual mounting slots for improved stability.

Concealment Wings and Reducing Printing
Printing is the visible outline of the firearm through clothing, and it is the number one concern we hear from appendix carriers.
The effect is mechanical: the belt pushes on the wing, the wing rotates the holster, and the grip tucks in closer, so less grip sticks out and less prints.
ModWing™ Concealment Wing (Claw) Kit →
Our ModWing Concealment Wing Kit is a standalone piece of hardware with interchangeable riser inserts, so you can choose a strong or mild rotation based on what you are wearing.
A wing helps most with a slim holster and a proper belt. It cannot fix a holster that is molded wrong or a belt that sags.
Building a Comfortable Concealed Carry Setup for Your Body and Wardrobe
Comfortable concealed carry is a system, not a single product. Body type, clothing, and daily routine all shape which holster you should buy, and the same holster can be perfect for one carrier and miserable for another. The goal is to match the holster's geometry to the body and wardrobe you actually have.
Start With Your Real Wardrobe, Not Your Ideal One
Most beginners buy for the body they plan to have or the clothes they wish they wore. Buy for what is in your closet today.
- Fitted shirts and slim jeans. A slim IWB holster with a concealment wing conceals better than a bulky OWB rig. Look for a low-profile shell and a clip that does not add bulk at the belt line.
- Untucked shirts, hoodies, or a jacket most days. OWB becomes viable, and the easier draw may be worth the cover garment.
- Business casual or tucked shirts. Tucked carry usually means a tuckable IWB holster with a clip that hides behind the belt, or a deep-concealment setup. Expect a slower draw and more practice.
- Scrubs, athletic wear, or no belt. A standard belt-mounted holster will sag or shift. Address the belt or carry method before blaming the shell.
A practical test: lay out the three outfits you wear most often and ask whether each one can hide the holster you are considering. For real-world comfort picks reviewed before you commit, see our comfortable concealed carry holster review. If two of the three cannot, the holster is wrong for your life.
How Body Type Changes the Geometry
Body type does not determine whether you can carry; it determines where the holster sits comfortably and how much it prints.
- Slim build. Hip bones and ribs sit close to the surface, so a holster pressing on either gets uncomfortable fast. A different ride height, a forward cant, or a forward-shifted position can move the pressure point off the bone.
- Broader build or a softer midsection. Appendix carry can be comfortable, but the holster may need a longer shell or different ride height so the grip does not dig in when seated. A wing helps tuck the grip in.
- Long or short torso. Torso length changes how much grip sits above the belt line. A shorter torso often benefits from a lower ride height or more forward cant so the grip does not crowd the ribs.
This is why adjustability matters more than any single "best" position: changeable cant and ride height let you tune the geometry to your body instead of forcing your body to fit the holster.
Match the Setup to Your Daily Routine
Where you spend your day shapes which position works.
- Desk or driving most of the day. Appendix or a forward-canted hip holster tends to be kinder when seated, keeping the grip accessible and the shell off the seat back.
- On your feet and moving. Strong-side hip carry keeps the draw natural and the holster stable through bending and lifting.
- Active or bending-heavy work. A holster that shifts under movement will print and slow the draw. Prioritize a stiff belt, a clip that grips, and a shell that holds retention through motion.
The Trade-Offs, Stated Plainly
Every choice costs something. Concealment usually costs draw speed. Comfort when seated usually costs some concealment. A faster draw usually costs a cover garment. Decide which trade-off you can live with every day, because the setup you will actually wear beats the theoretically superior one you leave at home.
Why a Quality Concealed Carry Belt Holds Everything Together
A concealed carry belt is the foundation of the whole setup, and it is the item beginners skip. A flimsy dress belt sags under the weight of a loaded firearm, which lets the holster shift, which causes printing and an inconsistent draw.
A proper carry belt is stiff enough to resist twisting and wide enough to support the holster's clips, holding the holster in the same position all day.
Test your current belt before you buy a holster: clip an unloaded holster to it and see whether the belt rolls or sags. If it does, the holster is not the problem.
How to Safely Test Holster Fit and Comfort Before You Commit
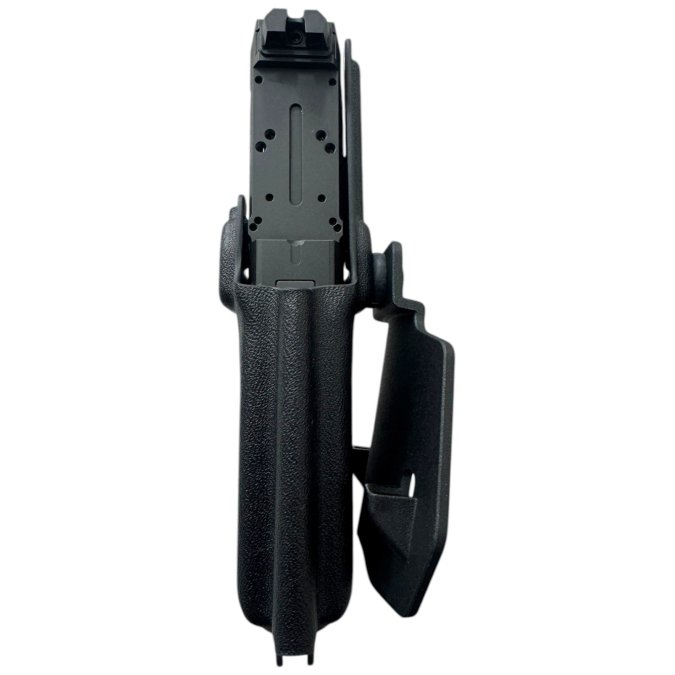
Most holster guides stop at comfort and concealment. The step beginners skip, and the one that catches problems early, is a structured fit test with an unloaded firearm before the holster ever sees a loaded magazine.
Step 1: Clear and Verify the Firearm
Remove the magazine, lock the slide back, and visually and physically confirm the chamber is empty. Set ammunition aside in another room. Do not test a holster with a loaded firearm, ever.
Step 2: Confirm Fit and Trigger Coverage
Seat the unloaded firearm in the holster and listen for the click. It should seat fully with light pressure, with no rocking or rattle. Then check trigger coverage by looking and feeling around the trigger guard: nothing should be able to reach the trigger while the firearm is holstered. Full trigger guard coverage is non-negotiable.
Step 3: Test Retention
Holster the unloaded firearm, turn the holster upside down over a soft surface, and shake gently. It should not drop free. Then draw it: it should release with a firm, consistent pull. If either test fails, adjust retention before you carry.
Step 4: Draw and Re-Holster Repeatedly
Draw and re-holster ten times. The draw should be smooth and the re-holster should not require forcing. If the firearm hangs up on the way out or will not seat cleanly on the way in, the holster is not matched to your firearm or your technique.
Step 5: Wear It Through Your Real Day
Put the unloaded firearm in the holster and wear it around the house for a few hours in your normal clothing. Then run through the movements your day actually includes:
- Sit and stand several times, including in a car seat or desk chair.
- Bend over to pick something up.
- Walk, climb stairs, and reach overhead.
- Check for printing in a mirror from the front, side, and back.
Pressure points, shifting, and printing usually show up in the first hour of real movement, not on the workbench.
Step 6: Decide, Adjust, or Return
If any step fails, adjust retention, cant, or ride height before carrying. If the holster cannot be adjusted to pass, return it. A holster that fails the trigger-coverage or retention test is not a holster you should carry.
Beginner Decision Tree: Which Holster Should You Start With?
Use this path to narrow the field before you shop:
- Do you wear a belt daily? If no, solve the belt or carry-method question first; a belt-mounted holster will sag without one.
- Is your usual outfit fitted or loose? Fitted points to a slim IWB with a wing; loose or layered opens up OWB.
- Do you sit or drive most of the day? If yes, lean appendix or forward-canted hip; if you are on your feet, strong-side hip is the simpler draw to learn.
- Do you carry an optic or weapon-mounted light? If yes, order the holster molded for that exact configuration, not a standard shell.
- Do you want the simplest possible draw to learn? Start strong-side hip, then move to appendix once you are comfortable.
Beginner's Buying Checklist
- Confirm the holster is molded for your exact model, generation, optic, and light
- Verify full trigger guard coverage
- Confirm retention is adjustable
- Check that cant and ride height can be changed
- Match the holster to your real wardrobe, not your ideal one
- Confirm the belt attachment suits your belt width
- Test unloaded before carrying loaded
- Confirm the return policy before ordering
After the First Month: Inspection and Replacement
A holster is not a lifetime purchase. Check it periodically for cracks, loose hardware, worn clips, and changes in retention. Kydex holds its shape well, but clips and screws wear; a holster that has lost retention or developed a crack should be replaced rather than carried.
For training and legal questions, seek qualified instruction and check the laws that apply where you live. This guide covers holster selection, not legal advice or firearms training.
Common Beginner Mistakes and How to Avoid Them
Buying for a gun you do not own yet, or for a configuration you plan to add later, is the most expensive mistake. Order for the setup you have now.
Other frequent errors:
- Skipping the belt. A good holster on a bad belt still sags.
- Over-tightening retention to feel "safe," which makes the draw slow and inconsistent.
- Buying a generic holster that "fits most compacts" and then wondering why it rattles.
- Ignoring the draw until the first range session. Practice the unloaded draw at home first.
- Chasing the cheapest option and replacing it three times. One properly fitted holster costs less than three wrong ones.
Watch out: carrying a firearm in a holster that does not fully cover the trigger guard is the one mistake that can turn a routine day into an accident. If the trigger is reachable, the holster is wrong.
Choosing a holster is really a decision about how you dress, where you sit, and what you carry, and getting it right the first time saves both money and frustration.
Frequently Asked Questions
What is the best holster for a beginner to carry concealed?
There is no single best holster, but a firearm-specific Kydex IWB holster is a strong starting point for most new carriers. It holds its shape for one-handed reholstering, covers the trigger guard fully, and lets you adjust retention. Look for adjustable cant and clip position so you can tune the ride height to your body. A holster molded for your exact model, like a Glock 19 IWB holster, removes the guesswork that universal-fit designs create.
Is Kydex or leather better for a beginner holster?
Kydex offers consistent retention, full trigger guard coverage, and it will not soften or collapse over time the way leather can. That rigidity makes one-handed reholstering safer for someone still building draw and reholster habits. Leather is quieter and more flexible but requires a break-in period and needs regular checks as it wears.
How do I know if my holster fits my firearm correctly?
With the firearm unloaded and ammunition stored elsewhere, seat the gun in the holster and check three things. The trigger guard should be fully covered with no gap wide enough to admit a finger. The gun should click in and stay put when you turn the holster upside down and shake it gently. Retention should feel firm but allow a clean draw. If the gun rattles, sits too deep, or the trigger is exposed, the fit is wrong.
Why does a concealed carry belt matter so much?
A holster clips to your belt, so the belt carries the weight and controls movement. A flimsy fashion belt sags, twists, and lets the holster shift during the draw, which hurts both concealment and consistency. A stiff concealed carry belt helps keep the holster in place. Pair it with a stable clip, such as a steel monoblock, for a more consistent setup under a cover garment.


